Anyone who knows me knows I love bees! In fact, bees, and in particular honey bees, have taken over my life the past few years. When I am not busy crocheting or knitting, I am studying and advocating for Honey Bee Veterinary Medicine. And so about a month ago I was thinking about how beautiful honey comb is (I really do sit and just think about these things sometimes!), and it hit me that I would love to design a hat that replicates the intricate design of hexagonal cells in a repeating pattern. I let the thought of this hat roll around in my brain for a good few weeks before I started to imagine the stitches I would need to construct it. After developing a basic plan of using stitches worked in the front post to create the texture, I sat down with a ball of yarn in a honey yellow colour for inspiration and got to work. There was a lot of trial and error, and so so much frogging, and I am pretty sure I have created an entirely new stitch – the front post triple crochet double crochet triple crochet 3 together stitch (that’s a mouthful!). Finally I have the pattern exactly how I had seen it in my head. This is a more complicated pattern, well suited for the intermediate or advanced crocheter. But I have broken it down into written steps with detailed pictures of the complex stitches so that beginners can be successful at it as well. I also plan to do a video tutorial in the next week and will post details about that once it is completed! Stay tuned!
Materials
- Approximately 200 yards worsted weight (#4) yarn. I used Caron Simply Soft in Gold for the honey coloured hat.
- 6.0 mm crochet hook
- Tapestry needle
- Optional – faux fur PomPom
Size
This pattern makes one hat sized for an adult woman. The pattern is worked in repeats of 8 stitches.
Gauge
4” is 14 stitches by 18 rows.
Stitches
- sc – single crochet
- BLO – back loop only
- sc2tog – single crochet two together
- fpdc – front post double crochet
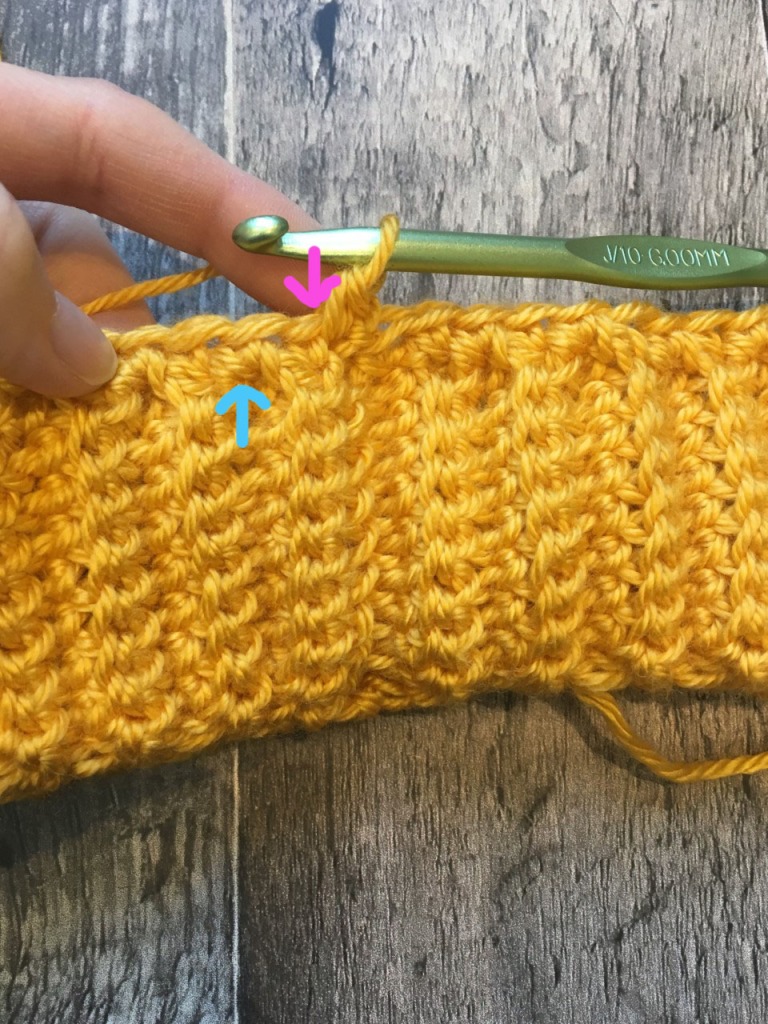
- yarn over, insert hook behind the post of the next stitch, yarn over and pull up a loop, yarn over and pull through 2 loops, yarn over and pull through the last 2 loops on the hook.
- fptc – front post triple crochet
- yarn over two times, insert hook behind the top of the fptc2tog below, yarn over and pull up a loop, yarn over and pull through 2 loops, yarn over and pull through 2 loops, yarn over and pull through the last 2 loops on your hook.
- fptc2tog – front post triple crochet 2 together
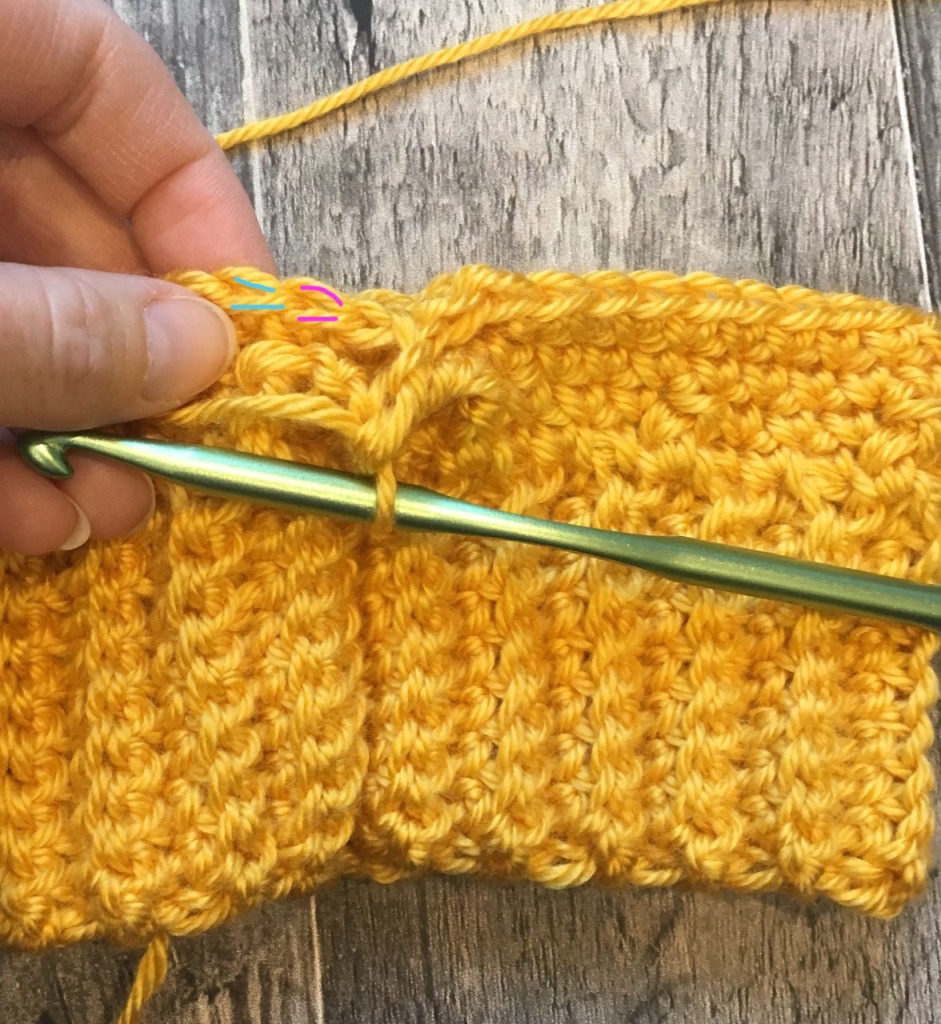
- yarn over two times, insert hook behind the post of the fptc (or fpdc) that is in 3 rows below and to the right of your hook, yarn over and pull up a loop, yarn over and pull through 2 loops on your hook, yarn over and pull through 2 loops on your hook, yarn over two times and insert around the post of the fptc (or fpdc) that is 3 rows below and to the left of your hook, yarn over and pull up a loop, yarn over and pull through 2 loops on your hook, yarn over and pull through 2 loops on your hook, yarn over and pull through all 3 loops on your hook.
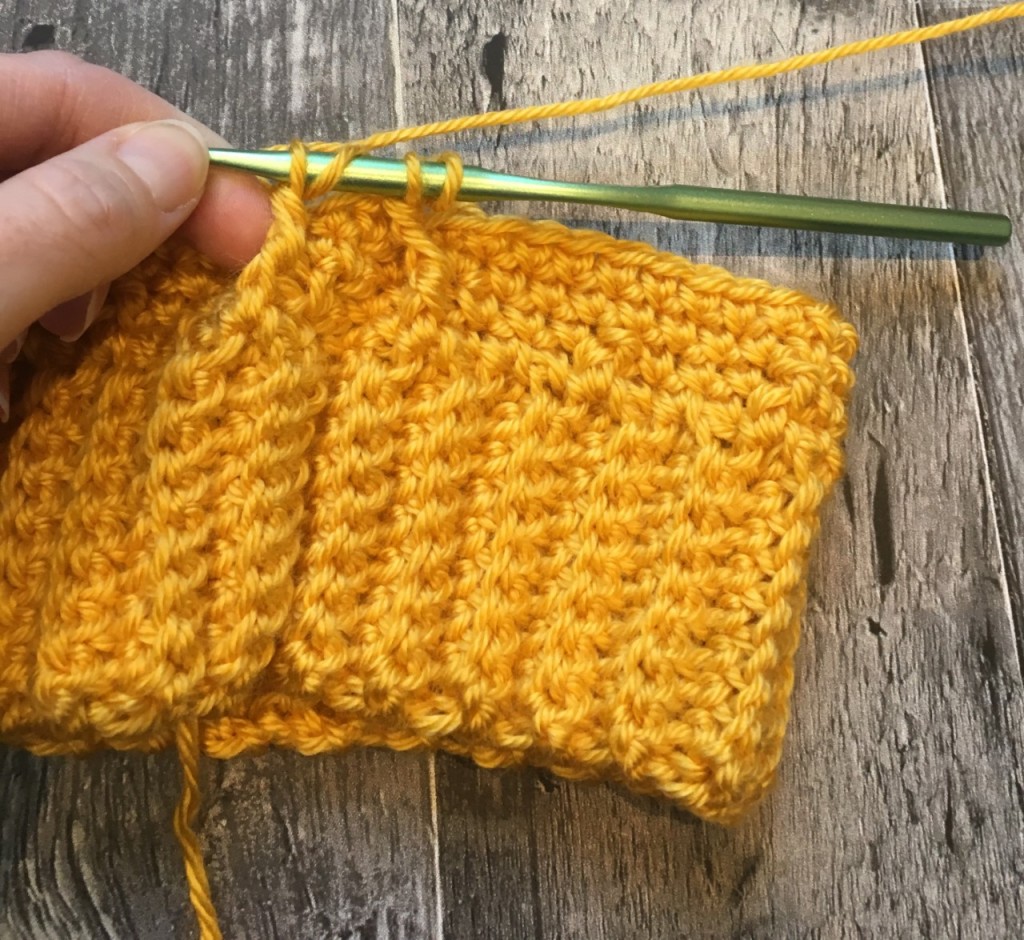
- fptcdctc3tog – front post triple crochet double crochet triple crochet 3 together
- yarn over two times, insert hook behind the fptc to the right of the hook, yarn over and pull up a loop, yarn over and pull through 2 loops, yarn over and pull through 2 loops. With 2 loops remaining, yarn over and insert hook behind fptc directly below hook, yarn over and pull up a loop, yarn over and pull through 2 loops. With 3 loops remaining on your hook, yarn over two times, insert hook behind the fptc to the left of the hook, yarn over and pull up a loop, yarn over and pull through 2 loops, yarn over and pull through 2 loops, yarn over and pull through the 4 remaining loops on your hook.

Pattern
Hat Band
Chain 10
Row 1: sc in second chain from hook, sc across, chain 1, turn (9)
Row 2-56: sc in BLO across first 8 stitches, sc (in both loops) of last stitch, chain 1, turn (9)
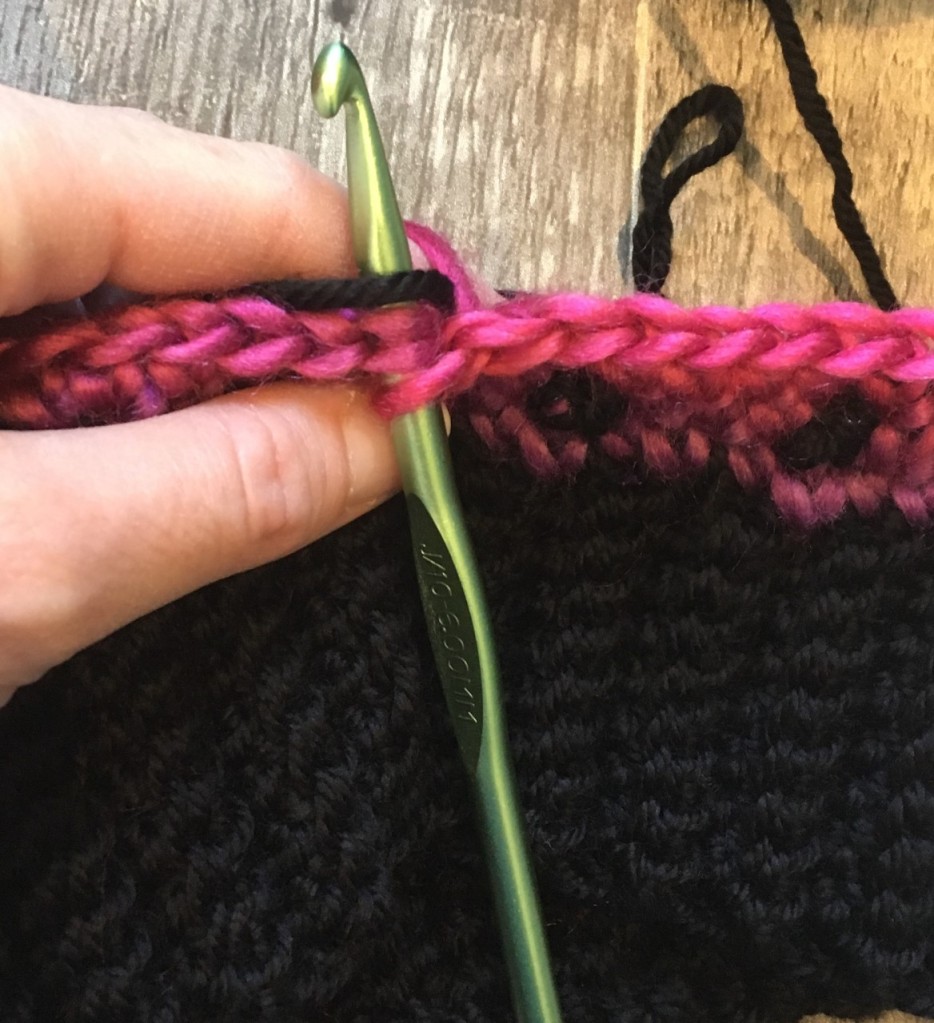
Slip stitch sc from BLO in last row to the foundation chain to join the hat band in a circle. Chain 1. The Body of the hat will be worked in the round, building up from the hat band.
Body of Hat
Row 1: sc into the top of each row of the hat band so that you have 56 sc. Slip stitch with the first sc of the row to join, chain 1. (56)
Row 2: sc, fpdc around the post of the second sc in row 1, *sc 3, fpdc around next post of the sc in row 1*, repeat around, end with sc 2, join, chain 1. (56)


Row 3: sc in each stitch around, join, chain 1. (56)
Row 4: sc in each stitch around, join, chain 1. (56)
Row 5: *fptc2tog, sc 3*, repeat around, join, chain 1. (56)


Row 6: sc in each stitch around, join, chain 1. (56)
Row 7: sc in each stitch around, join, chain 1. (56)
Row 8: sc 1, fptc, *sc 3, fptc*, repeat around to last 2 stitches, sc 2, join, chain 1. (56)


Row 9: sc in each stitch around, join, chain 1. (56)
Row 10: sc in each stitch around, join, chain 1. (56)
Row 11: *fptc2tog, sc 3*, repeat around, join, chain 1. (56)

Row 12: sc in each stitch around, join, chain 1. (56)
Row 13: sc in each stitch around, join, chain 1. (56)
Row 14: sc 1, fptc, *sc 3, fptc*, repeat to last 2 stitches, sc 2, join, chain 1. (56)
Row 15: sc in each stitch around, join, chain 1. (56)
Row 16: sc in each stitch around, join, chain 1. (56)
Row 17: *fptc2tog, sc 3*, repeat around, join, chain 1. (56)
Row 18: sc in each stitch around, join, chain 1. (56)
Row 19: sc in each stitch around, join, chain 1. (56)
Row 20: sc 1, fptc, *sc 3, fptc*, repeat to last 2 stitches, sc, join, chain 1. (56)
Row 21: sc in each stitch around, join, chain 1. (56)
Row 22: sc in each stitch around, join, chain 1. (56)
Row 23: *fptc2tog, sc 3*, repeat around, join, chain 1. (56)
Row 24: *sc 2, sc2tog*, repeat around, join, chain 1. (42)
Row 25: sc 1, *sc 1, sc2tog*, repeat around to last 2 stitches, sc2tog, join, chain 1. (28)
Row 26: *sc 1, fptc*, repeat around, join, chain 1. (28)
Row 27: sc in each stitch around, join, chain 1. (28)
Row 28: sc in each stitch around, join, chain 1. (28)
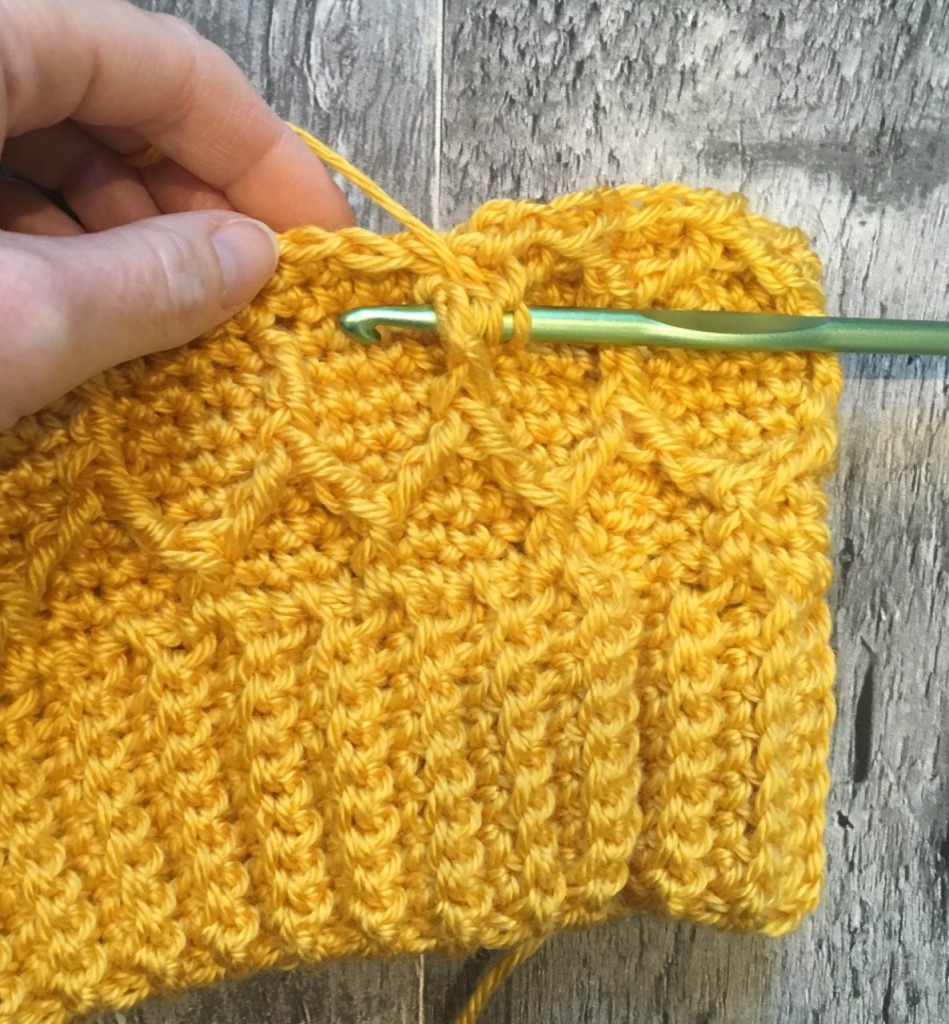
Row 29: *fptcdctc2tog, sc 3*, repeat around, join, chain 1. (28)


Row 30: *sc 2, sc2tog*, repeat around, join, chain 1. (21)
Row 31: sc 2, *sc2tog, sc*, repeat around, join, chain 1. (14)
Row 32: *sc, fptc*, repeat around, join, chain 1. (14)
Row 33: sc2tog around, join. (7).
Fasten off, leaving a long tail. Weave through the 7 single crochet and cinch to close. Attach a PomPom if you wish.
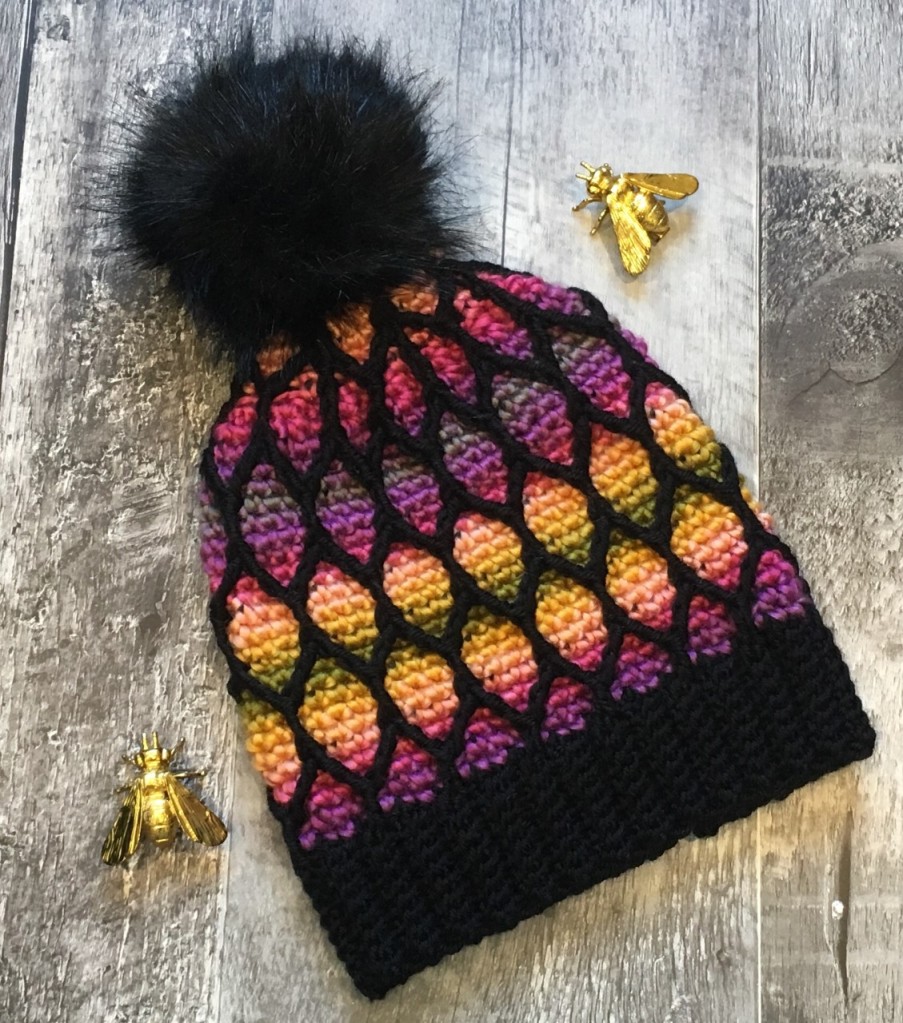
Pattern differences when working with 2 different colours
Using a contrasting colour for just the honeycomb stitches creates a beautiful effect reminiscent of stained glass windows. Note a few changes to the pattern:
When changing colour, before finishing the stitch you are working on, change the colour and use the new colour to pull through the loops.

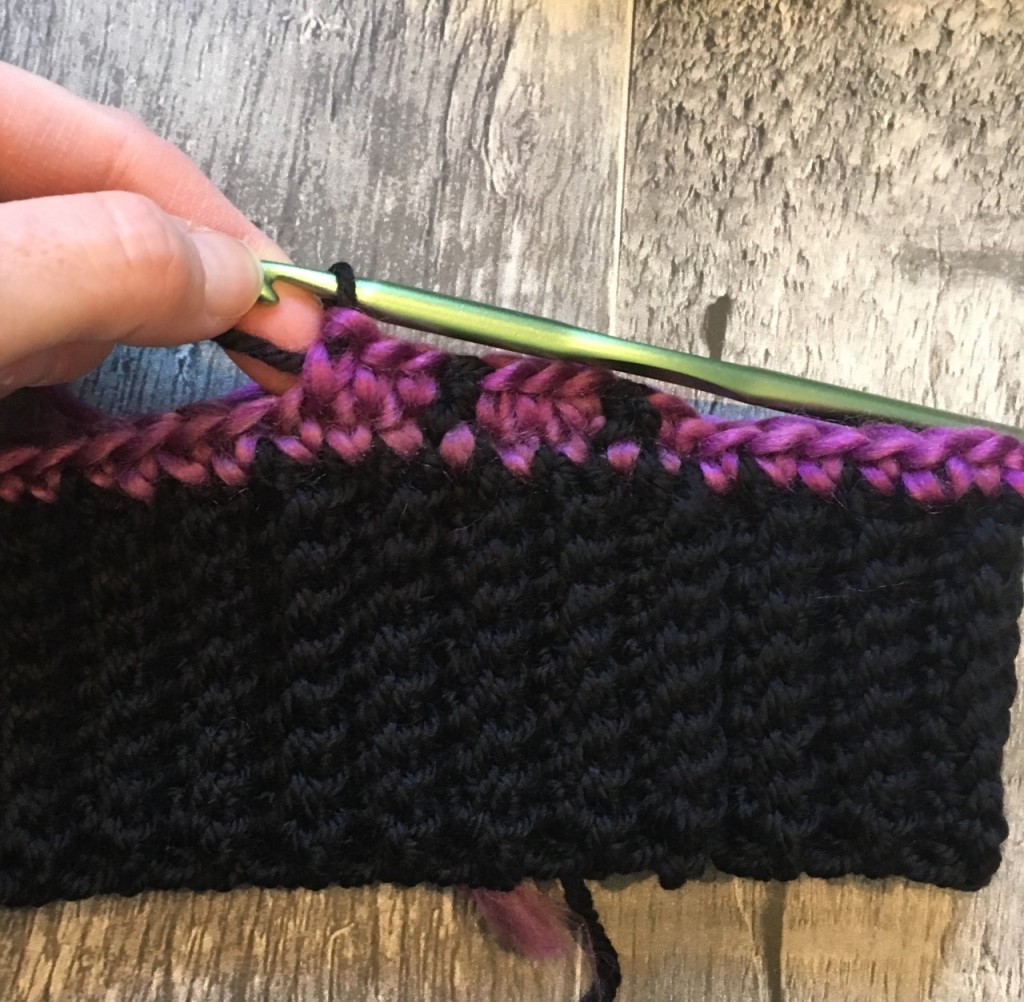
In rows that you will be switching back and forth between colours, carry the other colour through the stitches to make changes easier (and to have less ends to weave in!).

In Rows that only use one colour, when joining, make sure to tack the other colour into the join stitch, this way you do not have to cut the yarn between rows with multiple colours and will have less ends to weave in!
In Row 2 – when working the fpdc, insert hook just below the sc post and into the hat band – this will keep the honeycomb stitch colour consistent with the hat band pattern.


As always, feel free to make this for personal use or sale, however, remember to give me credit for the pattern by linking my FB of IG accounts (One Knotty Dog). Please do not distribute copies of the pattern or my photographs without my permission. I would love to see all of your creations! Tag me or use the hashtag #oneknottydog, #thebeeinyourbonnet or #honeycombstitch. Send me an email to oneknottydog@gmail.com with any questions!
Happy making,
Britteny

Beautiful ❤
LikeLike
Thank you!
LikeLiked by 1 person
[…] Note: this pattern is worked in the round. The ch 1 at the end of each round does not count as a stitch. If you need a photo tutorial of how to do the fptc and fptc2tog check out my post The Bee in Your Bonnet Toque. […]
LikeLike
[…] Hello! I have spent the afternoon and evening working on this adorable hat. You can find the pattern here. […]
LikeLike
So I’m a bit confused, I’ve expanded it for a bigger fit but I cant get the count right. I start with 56 (64) but then once i start the fptc i lose a few stitches due the the fptc taking up 2 stitches. How do i get the same number of stitches after starting the fptc?
In case it doesnt make sense lol i start with 64 and end up with 54 after the fptc, this being way too small for me.
LikeLike
Hi Jess. You should not be loosing any stitches when you do the fptc. The fptc counts as one stitch – if you look at the back of the work it will sit in front of one stitch and then you sc into the next stitch. There are some good YouTube videos if you search fpdc or diamond crochet stitch. I hope this helps! If not, can you take a picture of your work on the fptc row and I can see if I can figure out why you loose stitches?
LikeLike
[…] The Bee in Your Bonnet Toque Hat […]
LikeLike